What is welding?
In a nutshell, welding might be defined as the fusion of two pieces of material. I say “material” because we can also weld plastic as much as metal. However, this article will just focus on metals.
We can split welding into two general categories.
Fusion welding
Fusion welding is common on our motorcycles, and requires melting of the metals being joined.
Non-fusion welding
Non-fusion welding requires heat to work, but we need to add a filler material that melts at a lower temperature than the parent material. Soldering (which might be used on copper wiring) is a great example of non-fusion welding.
Welding today
Since the early 1900’s, welding technology has progressed to the point that high quality welding machines are now affordable for small shops, farmers, artists and hobbyists.
Creating items from a pile of metal with the aid of welding surprisingly satisfying. But don’t expect to pick up a welding torch and lay down a perfect bead first time. Like any new skill, it takes practice to create a strong and attractive welded joint. Follow along and see whether welding is something you want to learn.
Benefits of welding
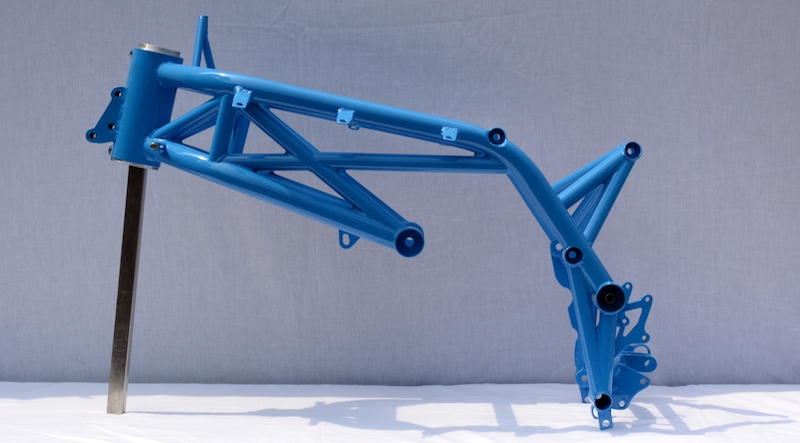
Welding is obviously a permanent process, compared with, say, bolting parts together. If the two parts are made of the same material, welding is a option for joining them. Welding allows you to make a complex shape like a motorcycle frame. A whole bunch of tubes and plates can be assembled into a strong and durable structure.
Excited? Ready to take the next step? Let’s look at the different welding processes and how suited they are to your custom motorcycle project.
Fusion welding processes
Manual Metal Arc Welding (“Arc” welding)

One of the earliest welding processes developed, arc welding uses – no surprises – an electric arc to generate the heat required to melt the metals involved.
The welding machine generates a voltage at the end of a consumable electrode. An arc is struck on the workpiece which is connected back to the welding machine via a grounding cable.
The electric arc melts the workpiece and the end of the electrode. The arc carries molten metal from the end of the electrode to the workpiece. This “filler” metal builds up the size of the weld. The electrode is covered with a “flux” which melts and forms a protective gas shield around the weld, preventing contamination of the weld. This flux then solidifies on the weld deposit to form a protective “slag” which has to be chipped off to reveal the weld beneath.
The welding machine will have controls that adjusts how much current flows through the circuit. The thicker the metal you are welding, the more current you need to melt it. Different electrodes are also available to suit different metal types and different metal thicknesses.
As metal is deposited from the electrode onto the workpiece, the electrode gets shorter. The amount of current flowing through the electrode will determine how fast it is consumed. Eventually it becomes too short and you must stop welding to replace the electrode.
The cheapest hobby welding machines you will find at your hardware store will probably use this welding process. I wouldn’t consider it a contender for your motorcycle project, as other processes covered below allow you to focus the arc and the filler metal much more precisely.
Looking for a ton more detail on arc welding? Click here to download a free 40-page Field Welding Guide eBook:
Send me the download link!
Gas Metal Arc Welding (“MIG” welding)

Gas Metal Arc Welding is commonly called “MIG” welding, which stands for “Metal Inert Gas”. An advancement of arc welding, MIG welding involves an arc struck between the workpiece and a continuously-fed consumable wire electrode fed through a torch. The wire is the “filler” and is melted and deposited into the weld to build up its size. The torch is also connected to a supply of shielding gas to protect the molten weld pool.
The consumable wire and type of shielding gas can be changed to suit different metals to be welded. With the right gas and wire, you can weld a range of ferrous (iron-based) and non-ferrous metals, such as aluminum. A mixture of carbon dioxide and argon is a common shielding gas used when welding steel. Straight argon is more common when welding aluminium. These are normally supplied in portable cylinders for shop use.
Controls on the welding machine will usually let you adjust the welding voltage and the wire speed. Both need to be increased for thicker materials, and reduced for thinner materials. Shielding gas flow is controlled via a regulator.
MIG welding machines are very popular, and perhaps more in the auto customizing scene. They are relatively cost effective, easy to operate, relatively easy to learn, and once set up, great for one particular metal, such as steel. On an auto project, this might be perfect. You can use a MIG welding machine to repair your chassis and panels, fabricate new parts and even weld up a steel exhaust system. On your motorcycle project, you might want the option of easily configuring the welding machine to suit other metals, such as stainless steel and aluminum. So, the next option is TIG welding.
Gas Tungsten Arc Welding (“TIG” welding)

Gas Tungsten Arc Welding is also commonly called “TIG” welding. “TIG” stands for “Tungsten Inert Gas”.
TIG welding is another arc welding process. However, instead of a consumable electrode as in arc or MIG welding, the electrode in TIG welding is made of a tungsten alloy. The tungsten electrode is used to carry the electric current which produces the arc and is not consumed during welding. A supply of shielding gas is used to protect the weld. Argon is a common, general purpose shielding gas used for TIG welding.
Since no extra metal is deposited by the electrode, filler metal is added to the weld by the operator. Usually one hand holds the torch directing the arc and shielding gas, and the other hand feeds in filler metal. Some models have a foot pedal to modulate the arc. As a result, you have both hands and one foot working together. This coordination requires more effort to learn, and practice to master. But if you can operate a motorcycle with throttle, clutch and gear shift, you can learn how to TIG weld.
Control panels on more sophisticated TIG welding machines look complex, but the ability to adjust the machine to suit the weld is one reason I prefer TIG welding for motorcycle projects.
With minor (and relatively cheap) changes to the tungsten electrode and the filler material, TIG welding can be used to weld steel, stainless steel and aluminum – the most common metals you will use on custom motorcycle projects. As a result, my choice is TIG welding.
Contrary to popular belief, TIG welding can also be used to repair cast iron, and I demonstrate the technique in this video:
Oxy-acetylene Welding

Acetylene is a highly flammable gas, that, when mixed with oxygen, generates a 6000 degree flame that is great for welding, cutting and heating of all sorts of metals.
Additionally, an oxy-acetylene welding and heating kit will be much cheaper than a quality welding machine. Factor in the cost of gas and it might be the most economical solution for your home shop.
Although modern welding machines are getting cheaper, oxy-acetylene is so versatile that it’s worth a look. Apart from using the flame to weld metals, you can use the cutting attachment to chop up steel plate, and the torch to heat rusted bolts, parts that are stuck and metal prior to bending. These are all common tasks working on motorcycles. It needs no electrical connections and is only limited by where you can position the gas bottles and the length of the hoses. If you have an oxy-acetylene set, you might suddenly acquire a lot of new friends who need your torch for their own projects.
Similar to TIG welding, with different filler rods you are able to weld a variety of different materials. However, since you are using a concentrated flame, the heat transferred to the parts can sometimes cause distortion. This is a bigger problem on thin sheet metal. As a result, the welding process using oxy-acetylene might not be your first choice for a motorcycle project.
This equipment has some particular safety concerns. As well as being explosive, acetylene is poisonous, causing nausea and headaches. Oxygen is required for combustion, and if you direct a stream of pure oxygen at something flammable, a fire can start easily. Anything flammable must be cleared away when using oxy-acetylene equipment. Don’t start using this equipment based on this article. There are a lot more safety issues to be aware of. Go and research the risks before you light the torch.
How to start welding
Safety
Welding is an activity that comes with some specific risks to your safety.
Protective clothing

Melting metals with an electric arc generates a lot of heat. When arc or MIG welding, sparks and slag will be flying all around you. The first step is protect yourself from burns with appropriate clothing. Cover up from head to toe in natural fibres such as wool or cotton, as synthetics melt when exposed to high temperatures, and will leave a nasty burn on your skin. Even when fully covered, sparks have a mind of their own. When the first one goes over your head and down the back of your shirt, you’ll know what I mean!
Watch out for folded cuffs or pockets that might catch flying hot sparks.
Leather boots are always a good idea. Flying particles always end up on the ground, and the tops of your feet will appreciate the protection.
When arc or MIG welding, you’ll need heavy, flame-resistant gloves to withstand the heat of the arc and the heat transferred to the workpiece. When TIG or oxy-acetylene welding, more dexterity is required to move the torch and filler rod, so thinner gloves are used. If you’re melting metal, it is seriously hot. Like, hundreds of degrees hot. When the metal is red or orange, it’s pretty easy to recognise the temperature, but it can still burn even when the colour is gone.
Arc rays
An electric arc generates radiation, so you need to protect your skin and eyes from burns. Clothing will protect your skin from a case of welding sunburn, but your eyes need special protection.

You can watch the arc while you are welding through a tinted shade. For welding applications, a plastic welding helmet fitted with a shade is necessary. The helmet will protect your face from burns and the tinted shade will protect your eyes. You can buy these very cheaply. The cheaper models have a flip-down fixed shade. In normal lighting conditions, you can’t see anything through the shade. When preparing to start welding, you flip the shade out of the way to get yourself into position to start the weld. Once you are ready to start, you flip the shade down and start welding.
The higher priced models have the ability to electronically change the tint in the shade, and automatically darken when their sensors detect an arc starting. I have this style and it is especially useful when TIG welding, as both your hands are busy with the welding equipment. They are a worthwhile investment as you get serious with your welding.
Equipment maintenance
To prevent injuries to yourself, you need to keep your equipment in safe working order. You should check the manual supplied with your welding machine, or locate an inspection checklist for your particular machine online.
At the very least:
- Do you understand how to operate your welding machine? Download the operation manual if you haven’t got one handy.
- Are all the connections tight?
- Are all the cables in good condition, including the main power supply cable?
Housekeeping
In addition to equipment maintenance, you need to consider the environment where you are welding.
- Have you cleared away any flammable materials?
- Are any bystanders likely to suffer injury from sparks or radiation?
- Is you mains power supply rated to supply the current needed for the welding machine?
Don’t burn your house down with careless welding practices!
Gas cylinders
- Have you checked the fittings are tight?
- Are the cylinders secured in the upright position?
- Are they clear of flames and sparks from welding?
- Is there any obvious damage to the cylinder?
Electric and magnetic fields
Electricity flowing through a cable generates a magnetic field around the cable. If you have a pacemaker fitted you should check with a doctor before taking up welding.
Electric shock
Electric shock is a very serious risk to someone undertaking welding. The current flowing during welding is certainly enough to stop your heart if electricity flows through your body, rather than back through the grounding cable.
Assuming your equipment is in good condition, then electric shock risks in your working area need to be managed.
The “primary shock hazard” is related to the mains power supply to your welding machine (ie 110V or higher). While good quality machines will have safety features to prevent shock, don’t take the cover off your machine while it is connected to the mains supply. There will be parts of the machine that are “live”. If you have a problem with the machine, consult a qualified person for assistance.
The “secondary shock hazard” is related to the electrode circuit. The electrode tip might be at 20-100 volts, and your workpiece will be at zero volts (since it is connected via the grounding cable to the welding machine). To receive a shock, your body must “complete the circuit” between the electrode and the workpiece. Preventing this shock is a matter of developing safe working habits. You need to “insulate” yourself from shock.

Treat the electrode as live at all times. Reach for the electrode holder, not the electrode itself.
Wear dry gloves to separate your skin from the electrode.
Long sleeves will insulate you from the work table if you happen to lean against it.
Keep yourself dry. Water conducts electricity. This means wearing rubber-soled boots if the ground is wet. Keep your clothes dry. Sweat is also a conductor, so hot weather is a risk too.
Modern welding machines often contain a “voltage reduction device” which reduces the electrode voltage to less than 5 volts. This is an added safety feature. However, if you have an older machine this feature may be missing. Treat all electrodes as electrically “live” and act accordingly.
Fire hazards
Flying sparks, slag and molten metal can travel quite a distance from your welding activities. Before welding, stop and have a look around.
Look for anything flammable, such as paper and cardboard, fabric, paint, gasoline. If you weld on a painted surface, the heat will likely ignite the paint.
Using water to extinguish a fire near electrical equipment is not a good idea. Keep a dry-powder fire extinguisher handy.
Fumes
Both the welding process and the metals being welded can be a source of fumes. Flux from arc welding electrodes forms a gas shield, and the molten metal workpiece may be releasing compounds. These form a “fume plume”. Ideally you don’t want to be inhaling it.
Since it is virtually impossible to identify the exact metal alloys we are welding in our custom bike projects, it is impossible to know what sort of nasties will be in the fume plume. So the best option is to avoid it altogether.
Ensure there is sufficient airflow in your welding area to move the fumes away from you. Sometimes being in a large space is sufficient. Other times, you might need a fan to blow the fumes away. Industrial workplaces will have extraction fans to suck up the fumes, but this is unlikely in the small shop. Use common sense. Open a door to ventilate the space at the very least.
Choosing a welding process
The reasons for choosing arc, MIG, TIG or oxy-acetylene welding vary depending on your needs, but here is my summary of the pros and cons of each technique, specifically related to custom motorcycle projects. Remember, this is just my opinion based on how I use my welding equipment. One is the lowest/worst rating, and five is the highest/best rating
| Arc | MIG | TIG (AC/DC) | Oxy-actylene | |
| Learning curve | 3 | 4 | 1 | 2 |
| Cost to purchase | 4 | 3 | 1 | 5 |
| Suitability to weld different thickness materials (eg up to 6mm) | 4 | 5 | 5 | 3 |
| Suitability to weld carbon steels | 5 | 5 | 5 | 4 |
| Suitability to weld stainless steel | 3 | 3 | 5 | 3 |
| Suitability to weld aluminum alloys | 1 | 3 | 5 | 4 |
Choosing a welding machine
I have had the opportunity to use welding machines at both the cheap and expensive end of the market. It’s always tempting to assume a cheap machine can do the job of an expensive machine, but this is not my experience.
To a certain extent, you get what you pay for. A $100 machine cannot compare to a $1000 machine.
I have used a few different low-end machines and the construction is lighter-duty, and I found the machines were harder to “dial-in” to the best settings for the job.

If I could only purchase a single welding machine, it would be a good quality inverter AC/DC TIG welding machine around 160-200A output that also has arc welding capability. A machine with these specifications should have “high frequency” starting, which is technology in the machine to get the arc started easily. For the USA readers, I’m talking about a machine like this. Here in Australia, I use the previous model of this machine which I purchased a few years back.
While a TIG welding machine has the longest learning curve and a high upfront initial cost, I think it provides the highest flexibility for customizing motorcycles. You can weld thinner steels and aluminum alloys with the TIG function, then switch to the arc function if you wanted to quickly weld up some heavier steel plates.
You can build your shop benches and tool boxes, and, with the right know-how, weld repair almost anything. And, you’ll never buy another welding machine again, as this investment should last a lifetime.
For clarity, I would choose TIG over MIG because MIG requires different spools of wire and different torch cable liners if you are welding different metals. This is more expensive and takes more time to set up compared to TIG. If you think you’ll only ever weld steel, go for MIG. If you want the option to weld stainless steel and aluminum alloys, TIG is your choice.
I would choose TIG over arc welding as the weld control is much greater with TIG. You can very precisely control where the heat and filler metal are placed. Arc welding is great for heavier fabrication. TIG wins every time for motorcycle projects.
If you can attend a community college to learn welding, wait until you’ve completed your classes before worrying about purchasing a machine. You’ll get to use their machines and learn not just welding, but features of the machine you might want to consider.
I think it is important to point something out that is not obvious. The real skill I appreciate in professional weldors is the ability to look at a job, determine how to do it (in their head), configure their machine and equipment, then execute the weld perfectly.
It’s not overly difficult to learn the skills to run weld beads, regardless of the welding process you choose. It is more difficult to get an important weld right the first time.
When you are learning, you have to practice enough to be able to look at your job, and see the welding method you will apply. My only suggestion is to weld. A lot. Make all your shop equipment. Help your friends with welding projects. Every new project you tackle will teach you new skills. Even if you mess up a project, you’ll learn something. Don’t give up.
Beginner exercises
As mentioned, if you can, attend a community college to learn welding. This is what I did. I took one year of weekly night classes learning how to TIG weld. I would highly recommend this route. You’ll get structured lessons and exercises, plus, most importantly, immediate feedback and the fastest possible improvement in your skills.
Failing that, you’ll have to resort to YouTube and the big welding suppliers for information to get started. Learning welding is way outside the scope of this article but here are a few things to consider:
- Where possible, collect or purchase some metal for practice. While it is possible to “recycle” steel from other sources, it needs to be paint, dirt, rust and oil free if you are to have any success when learning. Visit a scrapyard or a local fab shop and see if you can purchase some offcuts of new, clean metal.
- My favourite on-line resource is Welding Tips and Tricks, and the associated YouTube channel.
- Another great source of information for newbies is MIG welding – DIY guide
- Other than that, you all know how to use Google, so go and do some more research.

Typical first beginner exercise is running weld beads on a piece of scrap metal. The idea is to practice the motion and develop the fundamental hand-eye co-ordination needed.
Just repeat this over, and over again, until you you can start and stop the weld wherever you want, and it doesn’t look like molten vomit.

Once you can cover plates with tidy weld beads, then you can start practicing the basic joints:
- Butt joints – want to weld some tubing together to form an exhaust system? You’ll need to master butt joints.
- Corner joints – building your welding bench or shop equipment will involve some corner joints.
- Tee joints – need to add a tank mounting bracket to your frame? Practice your tee joints.
- Lap joints – perhaps not that common on motorcycles, but always used as a training exercise.
There are many others but just start slowly and practice, practice and practice before you point the torch at your project bike.
Basic projects
Almost always, you can purchase any of these items cheaper than you can make them. But that’s not the point, is it? It’s much more fun making it yourself, to your own design and specifications. Google “welding projects” and see what images come up, or run a similar search on Pinterest for some inspiration.
- Purchase some brand new tubing, square or rectangular. Design and build a work bench.
- Build a rack to store your lengths of steel.
- Weld a piece of heavy tubing to an old steel car rim. Mount a vice on top. Now you have a portable workstation.
- Design and build a cart to store your welding machine. Fix some castors underneath so you can move it around your shop
- While you’re welding at your new bench, you’ll need to sit if you are running long TIG beads. Build a stool to sit on.
- Build a tool storage crate.
Weld finishing
If you’re installing a frame hoop, you’ll probably want to sand the welds to make the joint invisible. You can do this with files, or with an angle grinder. Be careful with power tools. If you sand a flat spot in round tube it’s very obvious when painted.
Weld Quality
The general idea is to create an assembly of welded parts that are as strong as a single piece would theoretically be.
In practice, this doesn’t happen. The immense heat from either a flame or an electric arc affects the microscopic structure of the metal in the “heat affected zone” of the weld. In a production environment, many samples are welded and tested before production ever starts to ensure the welding process and machine settings will provide a high quality weld, every time. We don’t have this luxury on our project motorcycles, so we have to develop the confidence our welds will be sound.

A bigger problem with our custom bike modifications is simply the quality of the weld itself. To fuse the two (or more) pieces of metal together, the welding machine needs to be configured to deliver enough heat. If there isn’t enough heat, then the weld will not “penetrate” into the parent materials enough and the welded joint will be weak.
The novice welding student will not know what “good” weld looks like compared to a “bad” weld. This is another good reason for taking some formal training.
If you are unsure about welding on a motorcycle frame or other structural part, have a qualified weldor provide some instruction, or simply hand the job over to them if you doubt your ability. You could be risking your own life, and those around you, on a motorcycle with poor quality welds.
More resources
There is tons to learn about welding, but if you are curious, patient and have some co-ordination, you’ll be successful. Check out the following for your next steps into welding.
Haynes welding manual
I can’t remember where or why I bought this book, but it is extremely well written, explains all of the welding techniques described in this article, and I found I referred to it constantly while I was teaching myself to arc weld. Again, if you can go to a school to learn how to weld, don’t buy this book. Otherwise, check it out. Available from Amazon.
Welding Tips and Tricks
http://www.weldingtipsandtricks.com/
MIG Welding – DIY Guide
Lincoln Electric – Welding Safety
http://safety.lincolnelectric.com/
Miller – Welding Safety
http://www.millerwelds.com/resources/safety-precautions

